Hello Friends! Thank you for being here. It’s been quite a while since the last Foodsoulutions blogpost. I recently did this blogpost for KiraGrace Yogawear www.kiragrace.com and wanted to share it with my online community of subscribers here. ENJOY!
All Recipes by Natural Chef Jennifer Caroff @foodsoulutions.
Bio: Jennifer Caroff, Natural Chef + Health Coach, offers private chef services in the Northern California Bay Area and online health-focused cooking classes. To learn more about Jennifer go to: www.foodsoulutions.com. To see what Jennifer’s cooking follow her on Instagram @foodsoulutions.
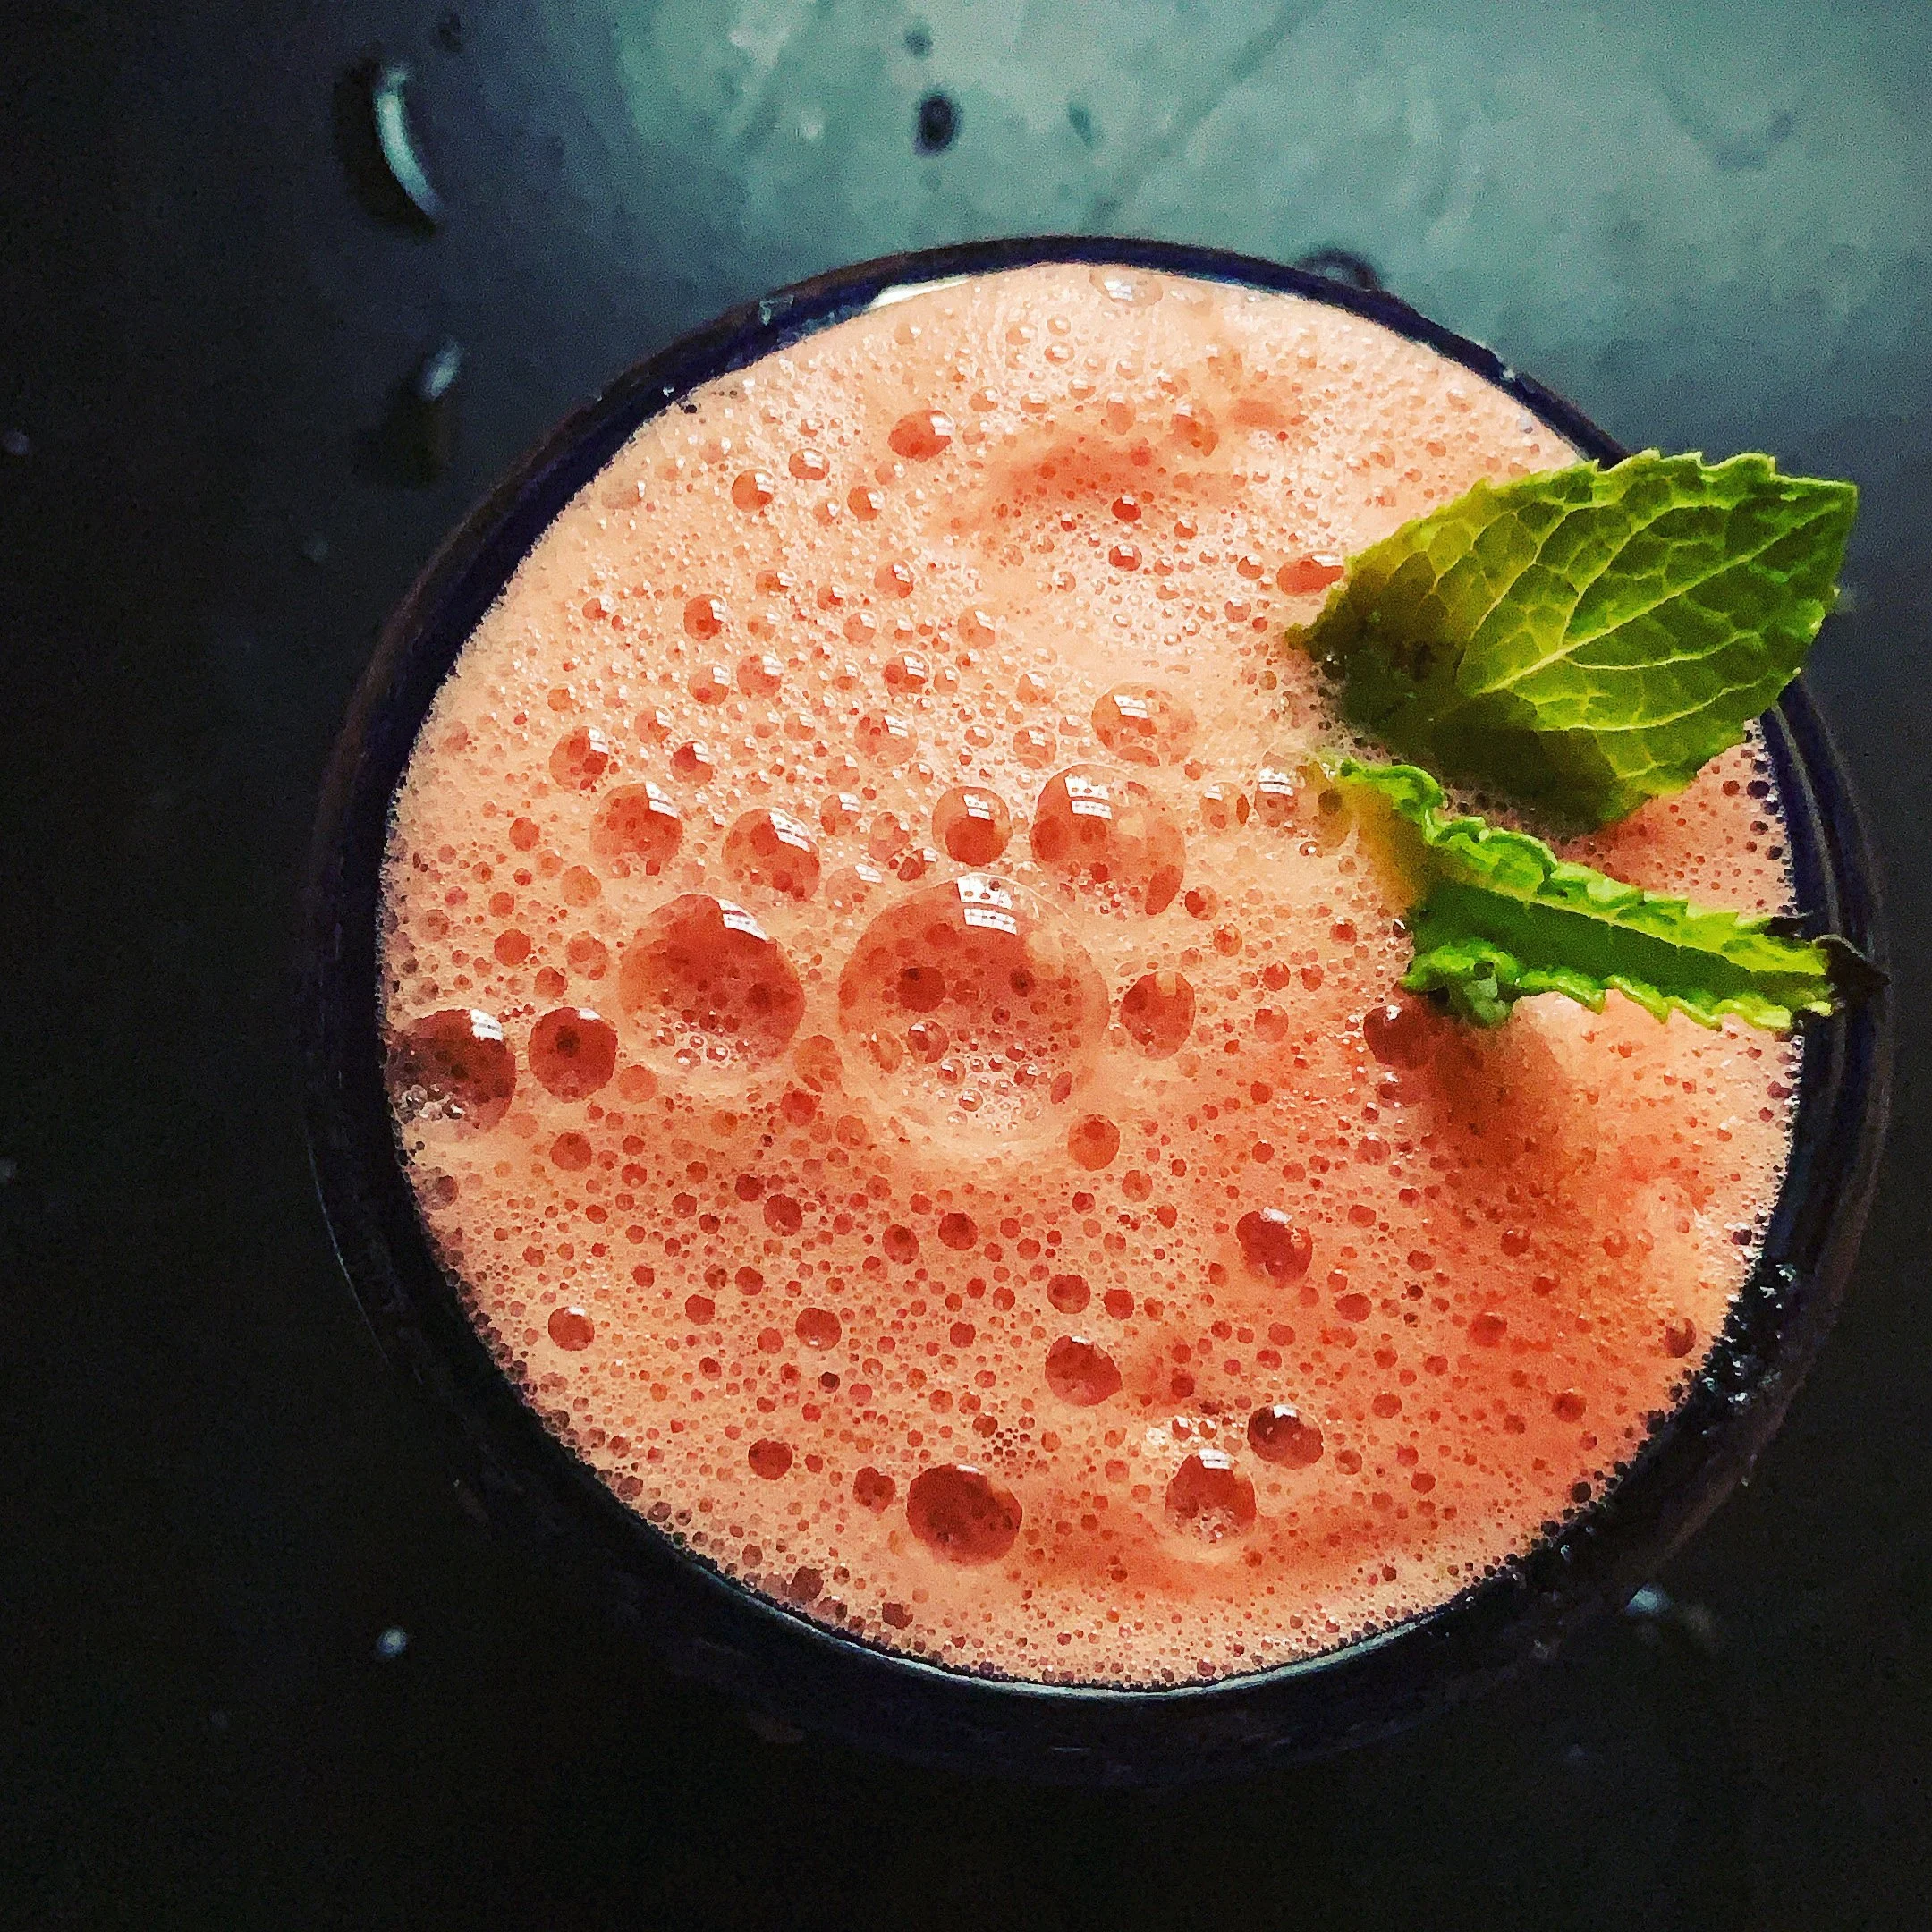
1. Blissful Watermelon Cooler
There’s nothing like watermelon on a hot day! Watermelon is hydrating, cleansing, and very easy to digest. High in enzymes, minerals and electrolytes, it has the unique ability to replenish the body almost immediately.* Ginger, mint, honey, dulse, limes and lemons are superfoods as well. The blend of all these ingredients together is truly uplifting. Of course you can adjust ingredients according to your needs and preferences.

Ingredients:
4-6 cups watermelon, cubed -you can just blend all the watermelon you have :-)
2” chunk fresh ginger , thinly sliced
1 cup fresh mint leaves, packed
1 tsp-1 Tbsp raw honey (local is always best)
1 Tbsp Atlantic dulse flakes
Juice of 3-4 limes of lemons (sub lemons if you don’t have limes on hand)
Procedure
Place all ingredients in a high-speed blender and blend until completely liquified.
Enjoy immediately, serve with a few ice cubes if desired, or store in a glass jar for up to 2 days in the refrigerator.Note: Learn more about the healing power of watermelon and melons here: https://www.medicalmedium.com/blog/healing-melon
2. Honey-fermented Strawberry Soda with Basil + Basil Seeds
This refreshing Summer soda will wow your tastebuds and delight your senses. The Honey-fermented Strawberry Syrup requires 3-5 days to make, but is worth the adventure and effort. The fresh basil helps to cool the heating qualities of both the strawberries and the honey, and basil seeds aid in blood sugar balance, in addition to being fun!

Ingredients
Honey-fermented Strawberry Syrup (see Honey-fermented Strawberries below)
Basil seeds (optional)
Basil leaves, thinly sliced
Sparkling water
Lime juice
Procedure For a Single Serving —To make this soda::
Add 2-3 tablespoons of the Strawberry Honey Syrup to a 16oz glass.
Add 1 teaspoon of basil seeds and a generous pinch of thinly sliced basil leaves.
Fill the rest of the glass with sparkling water.
Swirl the mix and wait for 5-10 minutes for the basil seeds to fully plump. Enjoy!
Honey-fermented Strawberries
Ingredients
3 cups organic strawberries, sliced
1 cup raw, local honey
½ tsp vanilla bean extract (optional)
Procedure
Place sliced strawberries in a clean small mixing bowl. Add in the vanilla bean powder.
Pour the honey over the berries and gently coat the berries in the honey. The honey will quickly liquify as it draws the juices from the strawberries.
Transfer the Strawberry-Honey mix to a clean glass jar. Seal the jar with a clean lid, and store the jar in a dark place to ferment for 3-6 days (depending on the temperature of the environment).
Check the mix every 1-2 days and shake the jar gently to circulate the berries in the honey liquid. You can taste the progress of the ferment on day 3 and decide if you like it or if you want to continue to ferment it. The ferment is done when the mix shows slight bubbles and the taste is to your liking, if you ferment too long, it will turn alcoholic, so we want to stop the fermentation before this happens.
Once the ferment is done, store the ferment in the refrigerator for up to 3 weeks.
To use in the soda, reserve the berries with a strainer, and use only the liquid portion, which we will call the Honey-fermented Strawberry Syrup. You can enjoy the Honey-fermented Strawberries anyway you like, they blend to a delicious sauce.
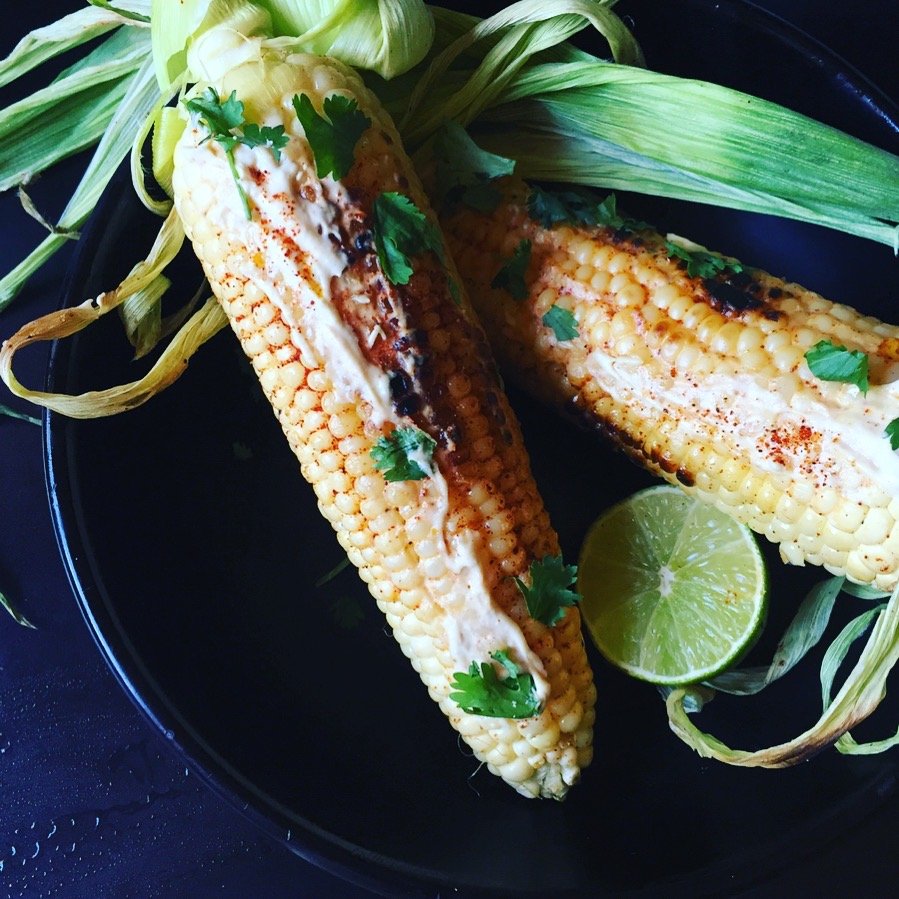
3. Summer Corn with Vegan Chipotle Cashew Crema
This recipe is an easy + delicious version of Mexican Street Corn or smothered corn. It’s so easy to make yet packed with flavor. The sauce tastes wonderful as a dip, salad dressing, or simply over some grilled summer veggies.
Ingredients
4-6 ears of corn, silk and outer husks removed & inner husks left on (optional)
1/2 C cilantro, chopped
Fresh lime wedges
For the Smoky Spicy Rub:
1 tsp sea salt
1 tsp smoked paprika
1 tsp ancho Chile powder
1/8 tsp cayenne (optional)
For the Vegan Chipotle Crema: Yield: about 2 cups
1 1/2 C cashews (soaked 4-6 hours)
2 T miso (yellow or light brown)
1 T olive oil
Juice of 1-2 limes
Zest of 1-2 limes
1-2 dried chipotle peppers soaked in
1/3 C water
Procedure for the Vegan Chipotle Crema:
Place soaked cashews in a high speed blender. Add miso, lime juice, lime zest, (preserved lemon), Chipotle peppers (seeds included) and their soaking water. Blend on low and increase to high speed until cashew cream is silky and smooth.
Adjust taste as desired. Store in a glass jar for up to 5 days in the refrigerator.
Putting it all together:
Heat cast iron skillet or grill over high heat.
Coat corn with olive oil, sprinkle with sea salt and place on cooking surface.
Turn corn as kernels turn golden brown to build up the flavor, approximately 10 minuets.
Rub ears with the Smoky Spicy Rub. Continue to cook for another 1-2 minutes.
Remove corn from heat and allow it to cool for a few minutes.
Smother with the Vegan Chipotle Crema, add more Smoky Spicy Rub, garnish with cilantro and serve with additional lime wedges as desired. Enjoy!
4. Cooling Thai Basil + Mint Coconut Cashew Sauce
Summer dressings and sauces are easy to make and vary with the bounty of fresh, available herbs like mint, basil, cilantro and parsley. This sauce combines mint and (Thai) basil along with dried coconut and soaked cashews for a creamier base. Once you have a few go-to sauces that you enjoy for the summer season you are good to go! They are so versatile and can double as salad dressings, dipping sauces, and sandwich spreads. They also go well with grilled, marinated, or roasted vegetables, grains, meats and fish.

Ingredients
1C medium shred coconut (or freshly grated if you have it!)
⅓ C cashews, soaked for 2 hours + rinsed
1 ½ C basil leaves, packed -you can try using various types of basil including Thai, Tusi or Opal varieties in addition to the more common Italian Globe Basils.
1 C mint leaves, packed
Juice of 1 lime, adding more if desired
1 Thai green chile, destemed + deseeded, reduce amount to decrease heat
1”-2” chunk of fresh ginger, peeled and chopped (choose desired spiciness)
1 ½ tsp salt, more to taste
Freshly cracked black pepper
1 cup water, add more for a thinner consistency
Procedure
Place all ingredients in a high speed blender and blend until smooth. Scrape down sides of blender as needed to incorporate all the ingredients.
Store in a glass jar for up to three days in the fridge. The color and flavors will be best on the first and second day.
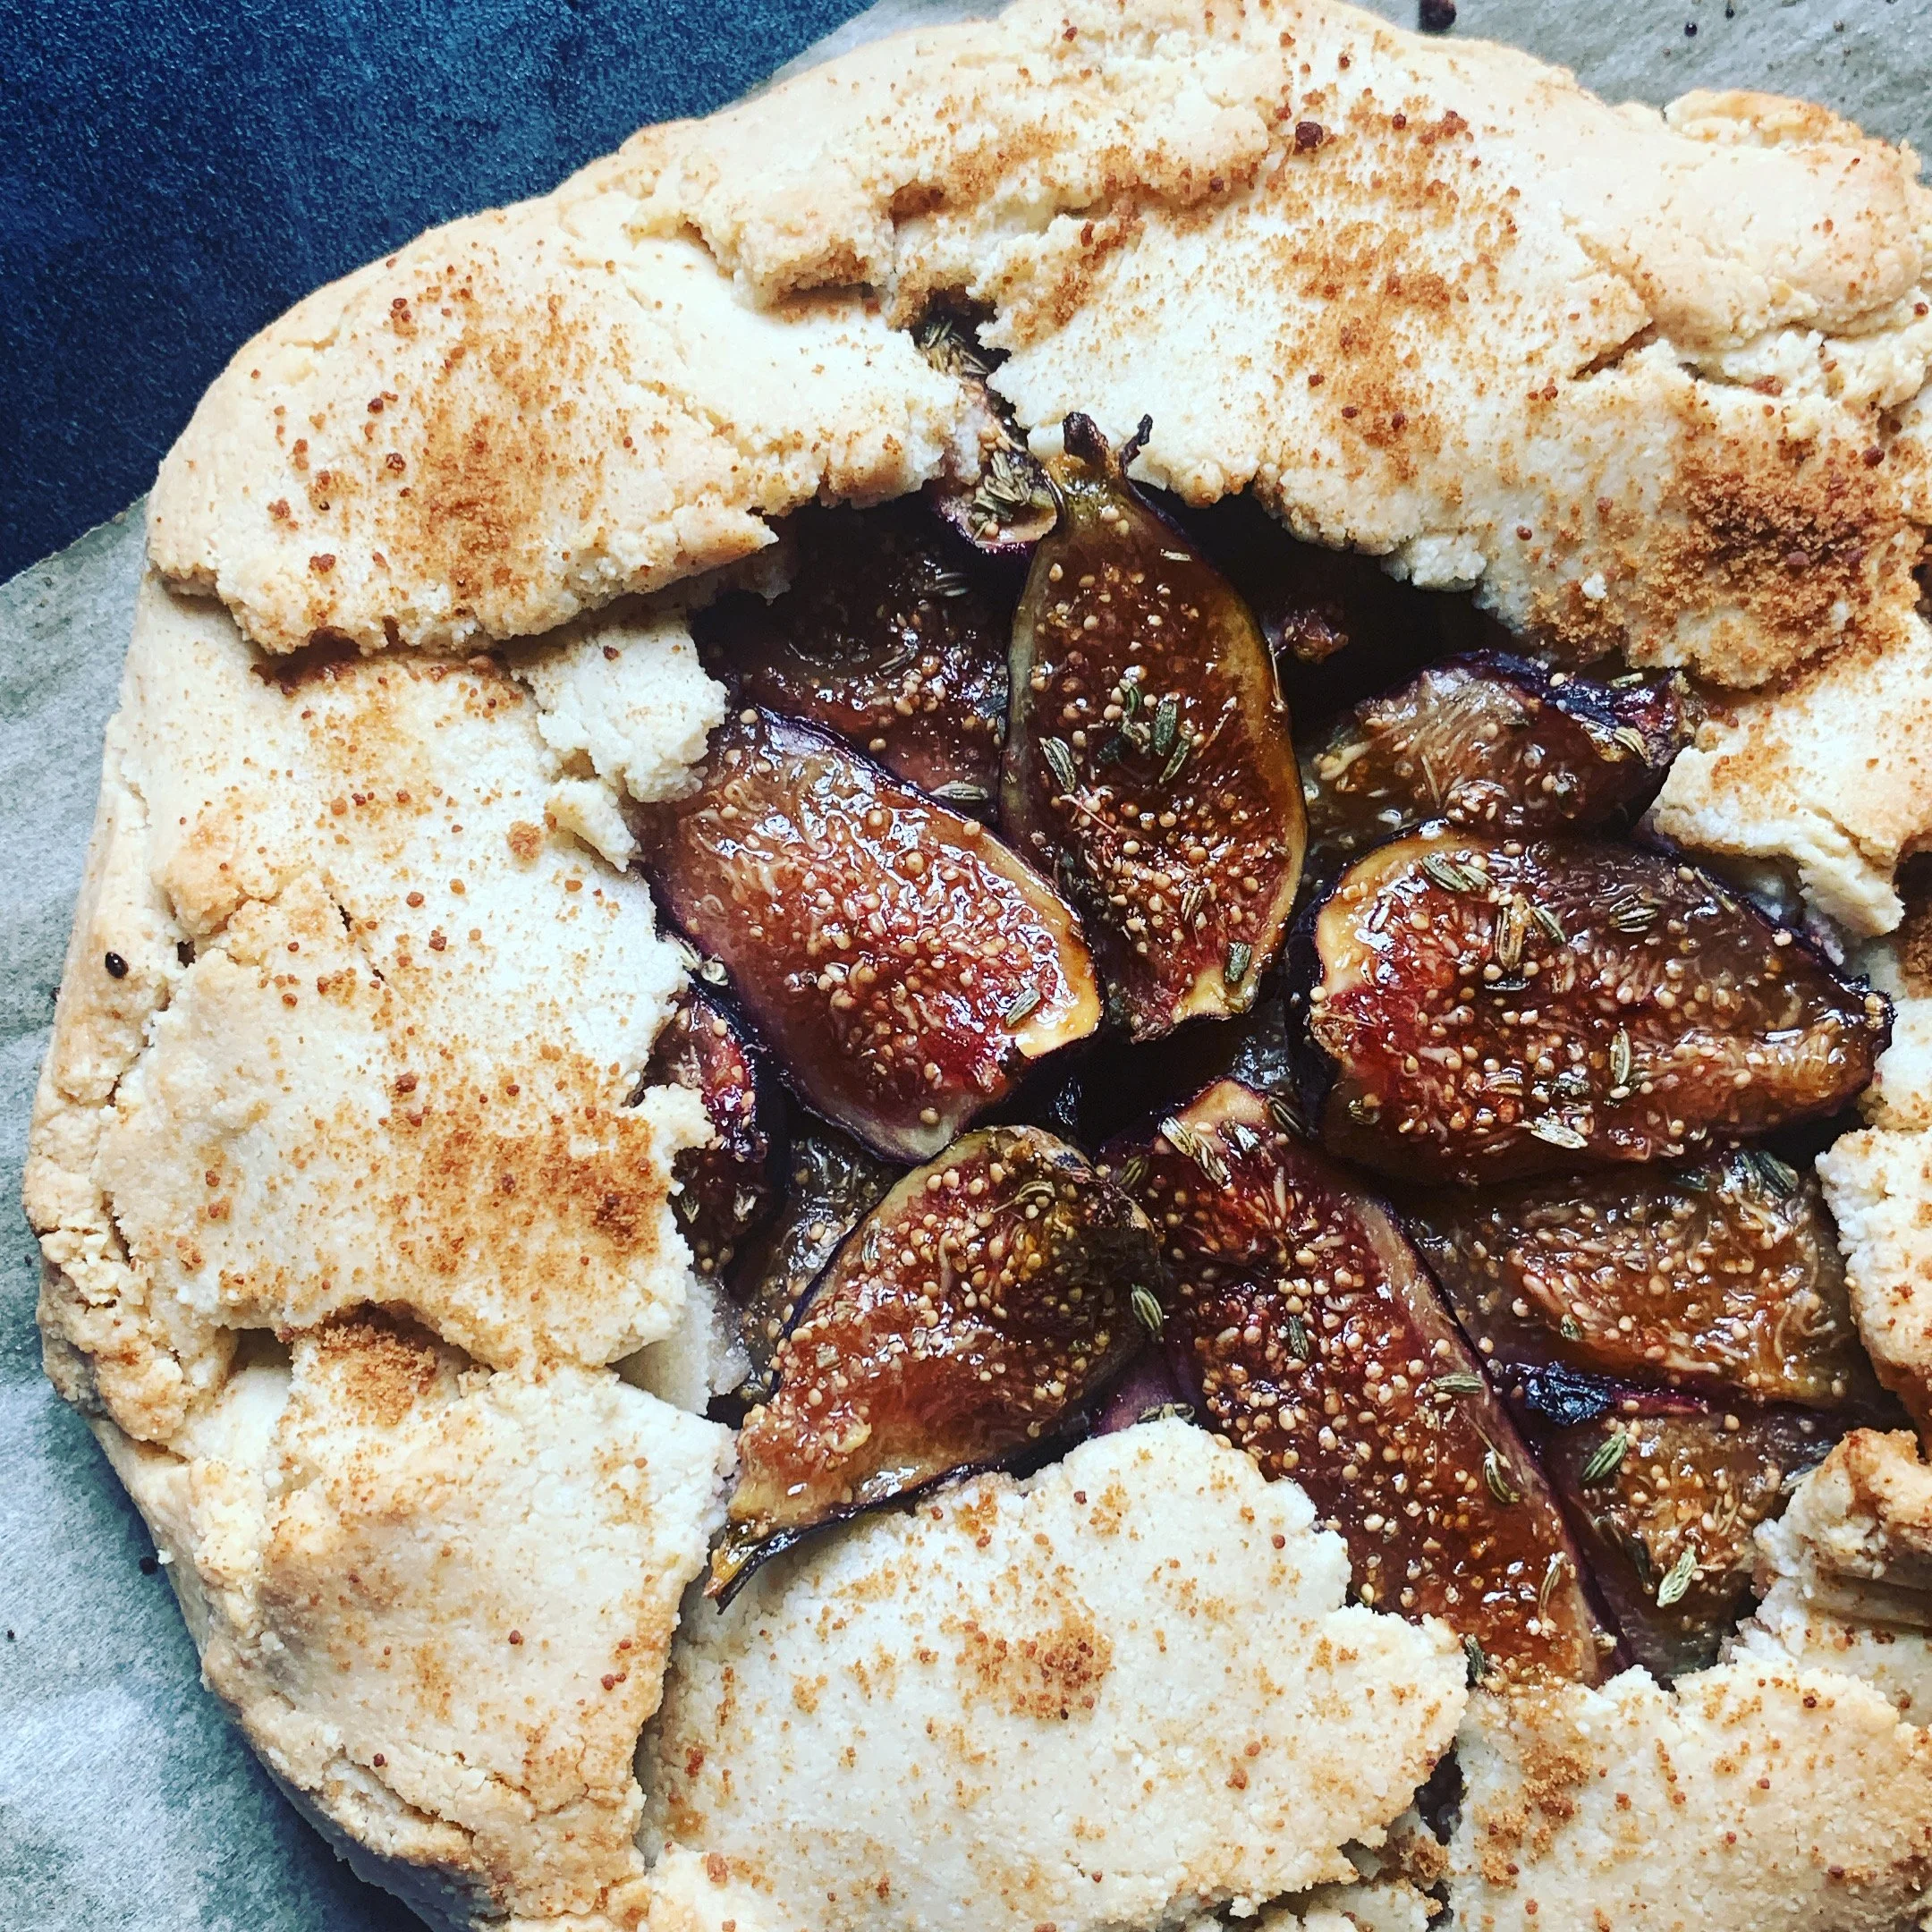
5. Fig + Fennel Almond Galette (V, GF)
Almond Flour Galette Crust adapted from Sarah Nevins www.asaucykitchen.com
Nothing says summer quite like fresh figs and fennel. Not only are figs and fennel seeds highly regarded as beneficial, healing foods, they also taste amazing together! The almond flour galette crust is easy to make, and can be used as a base for both sweet and savory fillings with a few simple adjustments. Once you learn how to make the dough, you will be ready to make many different combinations to fill a galette in any season.
Ingredients
Fruit Filling:
2 C figs, about 8 large figs, or equivalent
Squeeze of lime juice
Pinch of salt
1 tsp fennel seeds, roughly ground
½ -1 tsp freshly grated ginger (optional)
2 tsp arrowroot powder
1 tsp vanilla extract or powder
Fig or apricot jam (fruit sweetened only) (optional)
Gluten-free Crust:
2 C almond flour
½ C arrowroot powder
½ tsp salt
2 Tbsp maple syrup
¼ tsp almond extract (optional)
3 Tbsp coconut oil, melted, or olive oil
1-3 Tbsp water (see instructions)
Coconut sugar to sprinkle (optional)
Procedure
Preheat oven to 375F. Quarter the figs lengthwise and place in a small mixing bowl.
Add the lime juice, vanilla, salt, fennel seeds, and ginger to the figs, and gently combine.
Sprinkle the arrowroot powder over the figs and gently mix to incorporate. Set aside.
In a medium sized mixing bowl, combine the almond flour, arrowroot and salt. Add in the maple syrup, almond extract (if using), and oil and mix thoroughly to combine.
Slowly add in the water, a tablespoon at a time. Only add as much as is needed to form the dough so it holds together. If you add too much water, add additional almond flour to soak up the excess moisture. The dough should easily form a ball without sticking to your hands.
Form the dough into a ball and place on a parchment-lined baking sheet. Cover the dough with another piece of parchment and press to flatten.
Use a rolling pin to roll out the dough to about ¼ inch thick. Then peel back and remove the top piece of parchment.
If you are using a jam layer for the base of the galette filling, spread a thin layer of jam onto the dough, allowing plenty of room at the edges to fold over the galette crust.
Arrange the figs in the center of the dough. You can choose the nicest slices to showcase in the center of the galette.
Gently fold over the edges of the dough to form the galette crust. If the dough cracks, (remember this is gluten and egg-free), simply use your fingers and a touch of water to reshape and seal the cracks as you shape the galette.
Sprinkle a bit of coconut sugar along the edges of the crust and center figs.
Reduce the oven temperature to 350Fand bake for 30 minutes or until galette edges turn golden brown.
Allow the galette to cool for 20-30 minutes before slicing and serving.
Store in an airtight container in the refrigerator for up to two days. ENJOY!